Making a collaborative Color Grid
Create a color grid and make pixel pictures with friends. As users edit the color grid, changes will be automatically persisted and synced in real-time across clients.
Getting Started
Create a NextJS app and install y-sweet.
npx create-next-app@latest colorgrid --ts --tailwind
cd colorgrid
npm install @y-sweet/sdk @y-sweet/react
Run your app
npm run devEnable state synchronization and persistence
Get a connection string
If you haven't already, copy your connection string from the y-sweet dashboard (opens in a new tab). This connection string is used to connect your app to the y-sweet server that handles state sync and persistence.
getOrCreateDocAndToken
Replace the contents of src/page.tsx with the following. Pass your connection string key to getOrCreateDocAndToken. Change the definition of CONNECTION_STRING to include your personal connection string.
This connection string is then passed to YDocProvider, which creates a client-side websocket connection. This is how the client speaks to the y-sweet server. In this example, the getClientToken function is a React Server Action (opens in a new tab), as denoted by the 'use server' directive, which means this function will be executed on the server. In a production application, you will need to perform an auth check at the top of this function just as you would for any API endpoint.
import { getOrCreateDocAndToken } from '@y-sweet/sdk'
import { YDocProvider } from '@y-sweet/react'
import { randomId } from '@/lib/utils'
import { ColorGrid } from './ColorGrid'

// *****************************************************
// ** TO DO: Replace this with your connection string **
// *****************************************************
// For simplicity, we are hard-coding the connection string in the
// file. In a real app, you should instead pass this in through a
// secret store or environment variable.
const CONNECTION_STRING = '[paste your connection string]'

export default function Home({ searchParams }: { searchParams: { doc: string } }) {
  const docId = searchParams.doc ?? randomId()
  async function getClientToken() {
    'use server'
    // In a production application, you'd want to authenticate the user and
    // check that they have access to the given doc.
    return await getOrCreateDocAndToken(CONNECTION_STRING, docId)
  }
  return (
    <YDocProvider docId={docId} setQueryParam="doc" authEndpoint={getClientToken}>
      <ColorGrid />
    </YDocProvider>
  )
}
Note that you'll see errors when you run this code, because we haven't defined ColorGrid. We'll do that in the next section.
The Color Grid
Create a Color Grid Component
In another file that runs on the client side with use client, create your color grid component. Using the y-sweet hook useMap (opens in a new tab) to sync client state and persist it across sessions.
'use client'

import { useMap } from '@y-sweet/react'

const GRID_SIZE = 10
const DEFAULT_COLOR = 'white'
// For simplicty, we'll just add one color option
// We'll add the color picker in the next step
const COLOR_SELECTIONS = ['black']

export function ColorGrid() {
  // Initialize our Color Grid as an object of cell positions that map to
  // color values. `useMap` returns a Y.Map, and subscribes the component
  // to changes in that map.
  const items = useMap<string>('colorgrid')

  return (
    <div className="space-y-3 p-4 lg:p-8">
      <div>Color Grid</div>
      <table>
        <tbody>
          {Array.from({ length: GRID_SIZE }, (x, i) => (
            <tr key={i}>
              {Array.from({ length: GRID_SIZE }, (x, j) => {
                // Turn the cell position as a string.
                const key = `${i},${j}`
                const itemColor = items!.get(key)
                return (
                  <td key={key}>
                    <div
                      className="w-8 h-8 cursor-pointer"
                      style={{ backgroundColor: itemColor || DEFAULT_COLOR }}
                      onClick={() => items!.set(key, COLOR_SELECTIONS[0])}
                    />
                  </td>
                )
              })}
            </tr>
          ))}
        </tbody>
      </table>
    </div>
  )
}
Add a color picker
- Add a list of hex color codes to
COLOR_SELECTIONS - Keep selected color in local state, since this information doesn't need to be persisted across clients
- Set the value for a selected cell the active color
onClick
'use client'

import { useMap } from '@y-sweet/react'
import { useState } from 'react'

const GRID_SIZE = 10
const COLOR_SELECTIONS = [
  '#500724',
  '#831843',
  '#9d174d',
  '#be185d',
  '#db2777',
  '#f472b6',
  '#f9a8d4',
  null,
]
const DEFAULT_COLOR = 'white'

export function ColorGrid() {
  // Initialize our Color Grid as an object of cell positions that map to
  // color values. `useMap` returns a Y.Map, and subscribes the component
  // to changes in that map.
  const items = useMap<string>('colorgrid')
  // Keep the selected color as local state.
  const [selectedColor, setSelectedColor] = useState<string | null>(COLOR_SELECTIONS[0])

  return (
    <div className="space-y-3 p-4 lg:p-8">
      <div>Color Grid</div>
      <div className="space-x-2 flex flex-row">
        {COLOR_SELECTIONS.map((c) => (
          <div
            key={c}
            className={`w-8 h-8 cursor-pointer ring-2 ring-offset-1 ${
              c === selectedColor ? 'ring-pink-100' : 'ring-transparent'
            }`}
            style={{ backgroundColor: c ?? DEFAULT_COLOR }}
            onClick={() => setSelectedColor(c)}
          />
        ))}
      </div>
      <table>
        <tbody>
          {Array.from({ length: GRID_SIZE }, (x, i) => (
            <tr key={i}>
              {Array.from({ length: GRID_SIZE }, (x, j) => {
                // Turn the cell position as a string.
                const key = `${i},${j}`
                const item = items!.get(key)
                return (
                  <td key={key}>
                    <div
                      className="w-8 h-8 cursor-pointer"
                      style={{ backgroundColor: item || DEFAULT_COLOR }}
                      onClick={() => {
                        if (selectedColor === null) {
                          items!.delete(key)
                        } else {
                          items!.set(key, selectedColor)
                        }
                      }}
                    />
                  </td>
                )
              })}
            </tr>
          ))}
        </tbody>
      </table>
    </div>
  )
}
Run the app
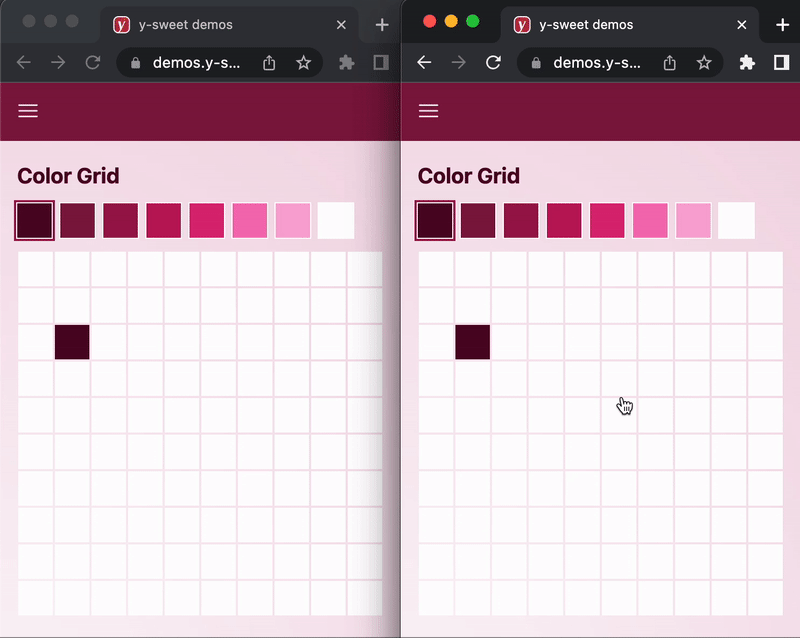
We have enough here to test the to do list.
Run npm run dev and navigate to localhost:3000 (opens in a new tab) or whichever port you're running on.
When you load the page, you'll notice a ?doc=... parameter appended to the url. This is a document ID automatically created by getOrCreateDocAndToken. If this ID is supplied in the url, the same doc will appear. Otherwise, a new doc will be created.
Using the debugger
In the developer tools, you'll find a link to the Y-Sweet Debugger. You can use it to inspect the state of your app.
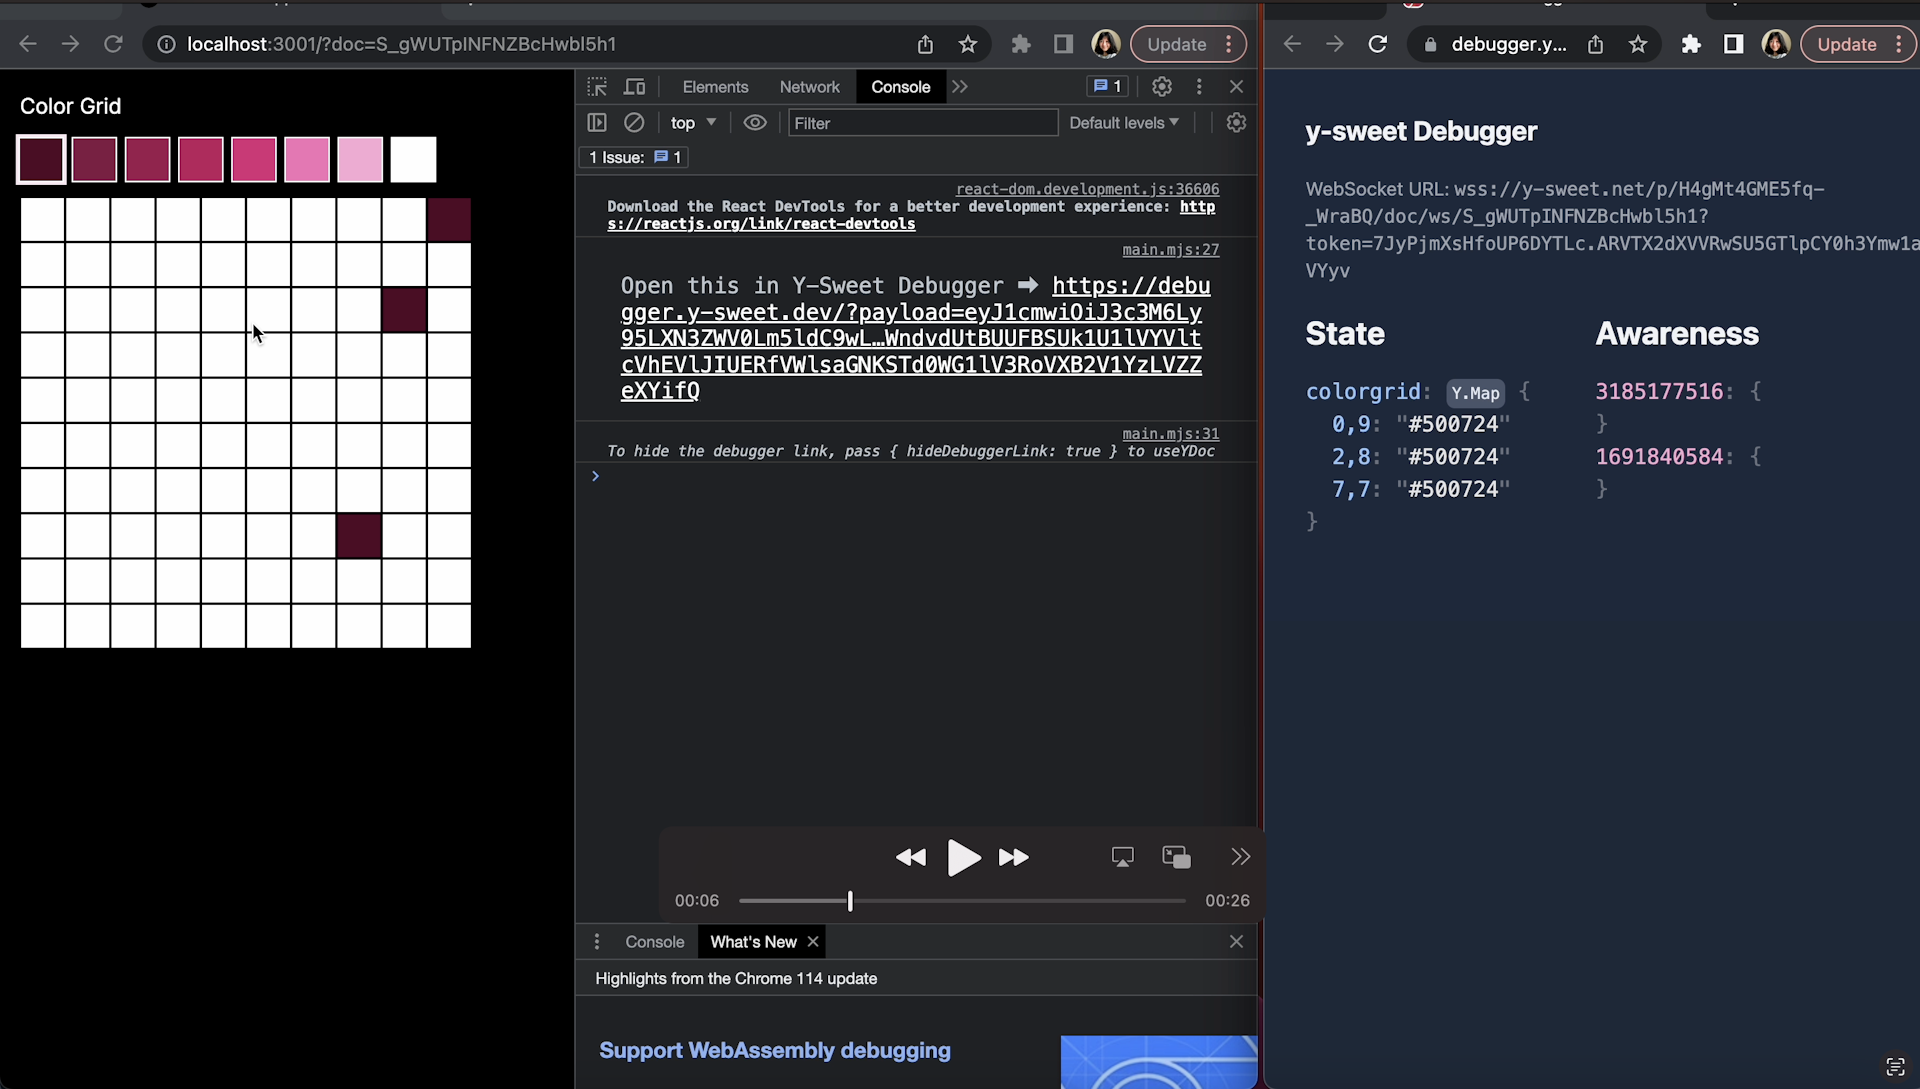
How to open developer tools:
Next Steps
Refer to our Color Grid demo
You can see all the code in action in our color grid demo (opens in a new tab) and style your Color Grid to match the cover image.