Bring your own storage
With Y-Sweet, we let you choose where you persist your document data. By default, your data is saved to our platform. But you can also opt into saving your data to your AWS S3 bucket instead. This tutorial will walk you through opting in to Y-Sweet's BYOS (bring your own storage) feature.
Opting for BYOS
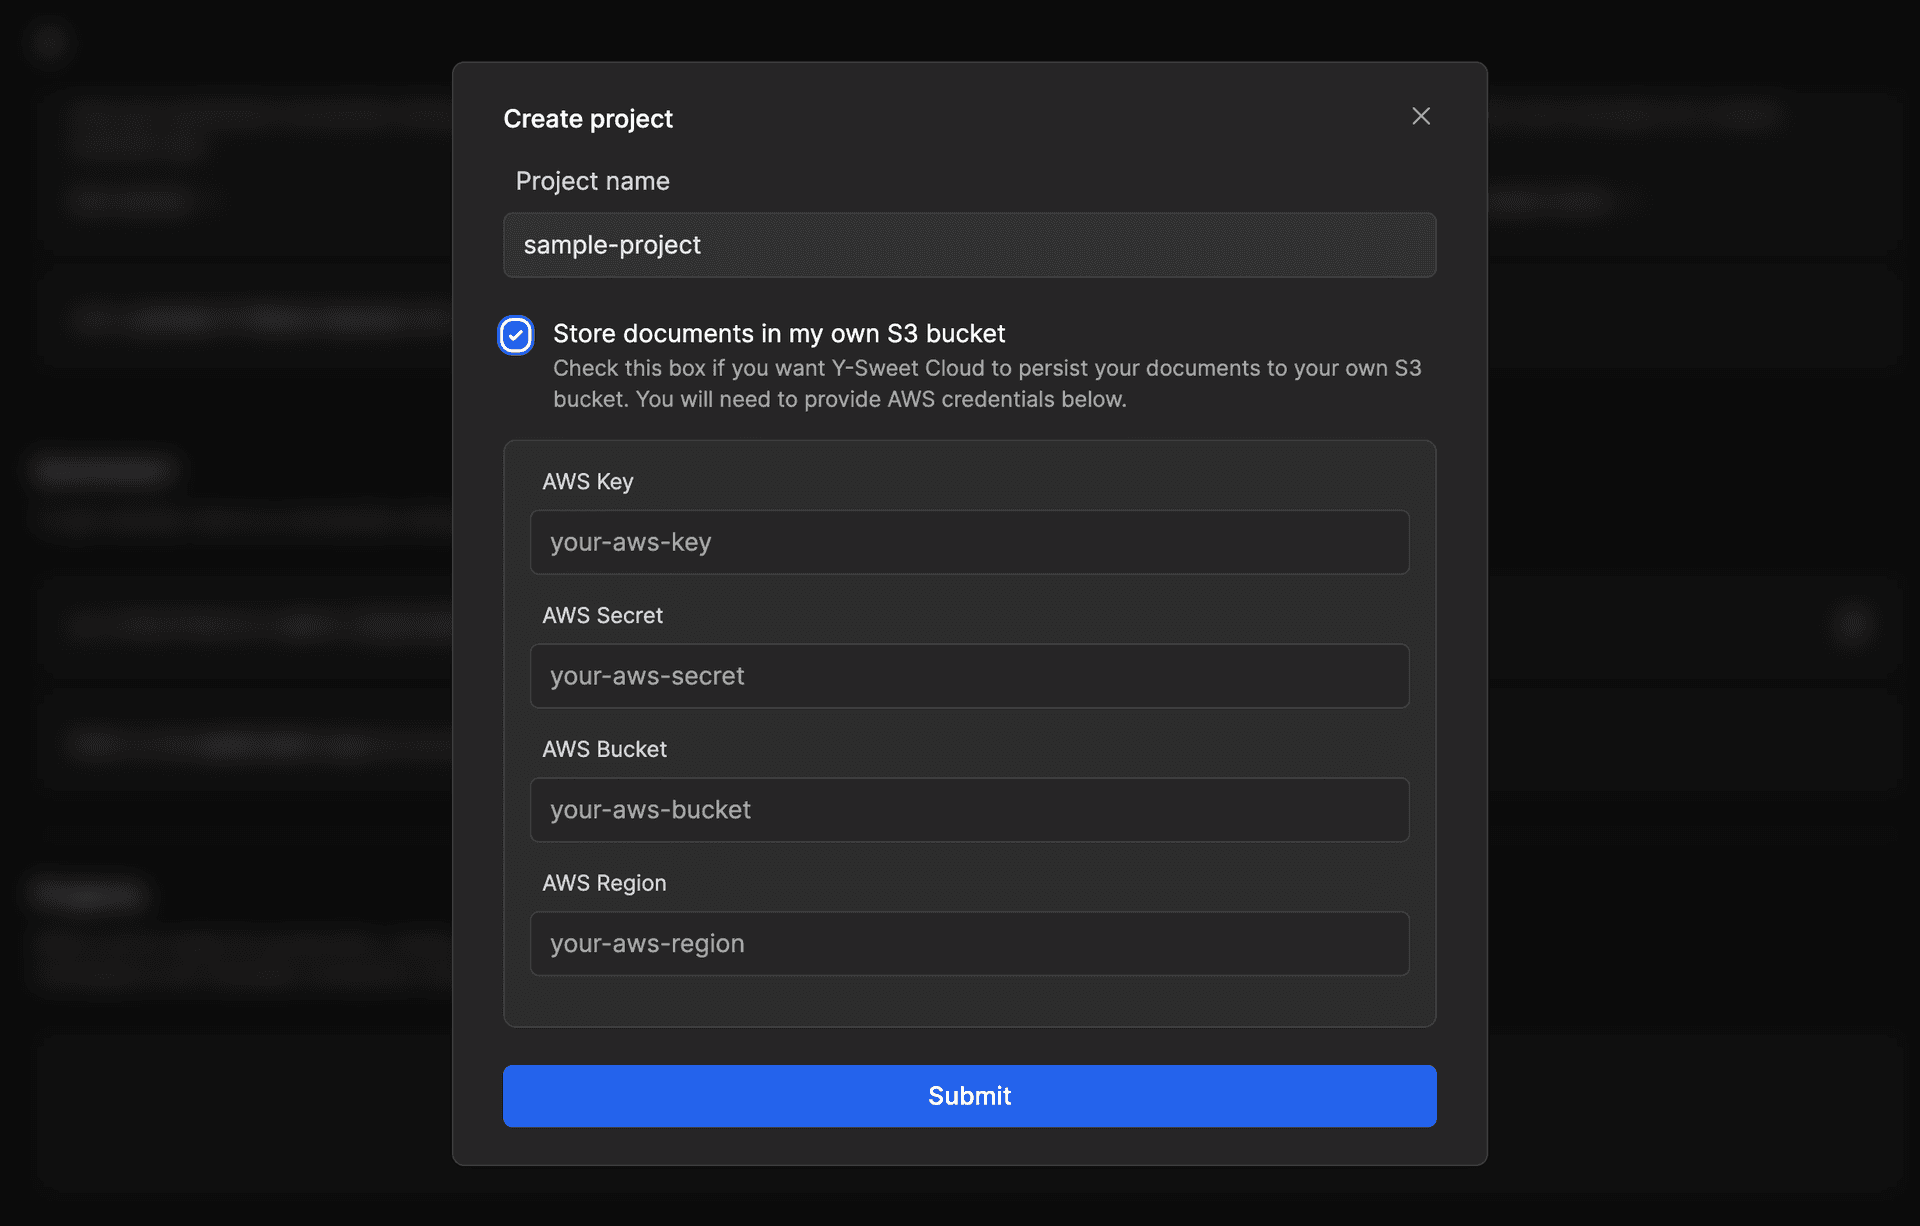
When you're creating a project in the Y-Sweet Dashboard (opens in a new tab), you can opt into BYOS by checking "Store documents in my own S3 bucket" and providing the information needed to connect to your S3 compatible storage.
Getting AWS S3 Credentials
In the AWS Console (opens in a new tab), navigate to the S3 Service (opens in a new tab) and create an S3 bucket
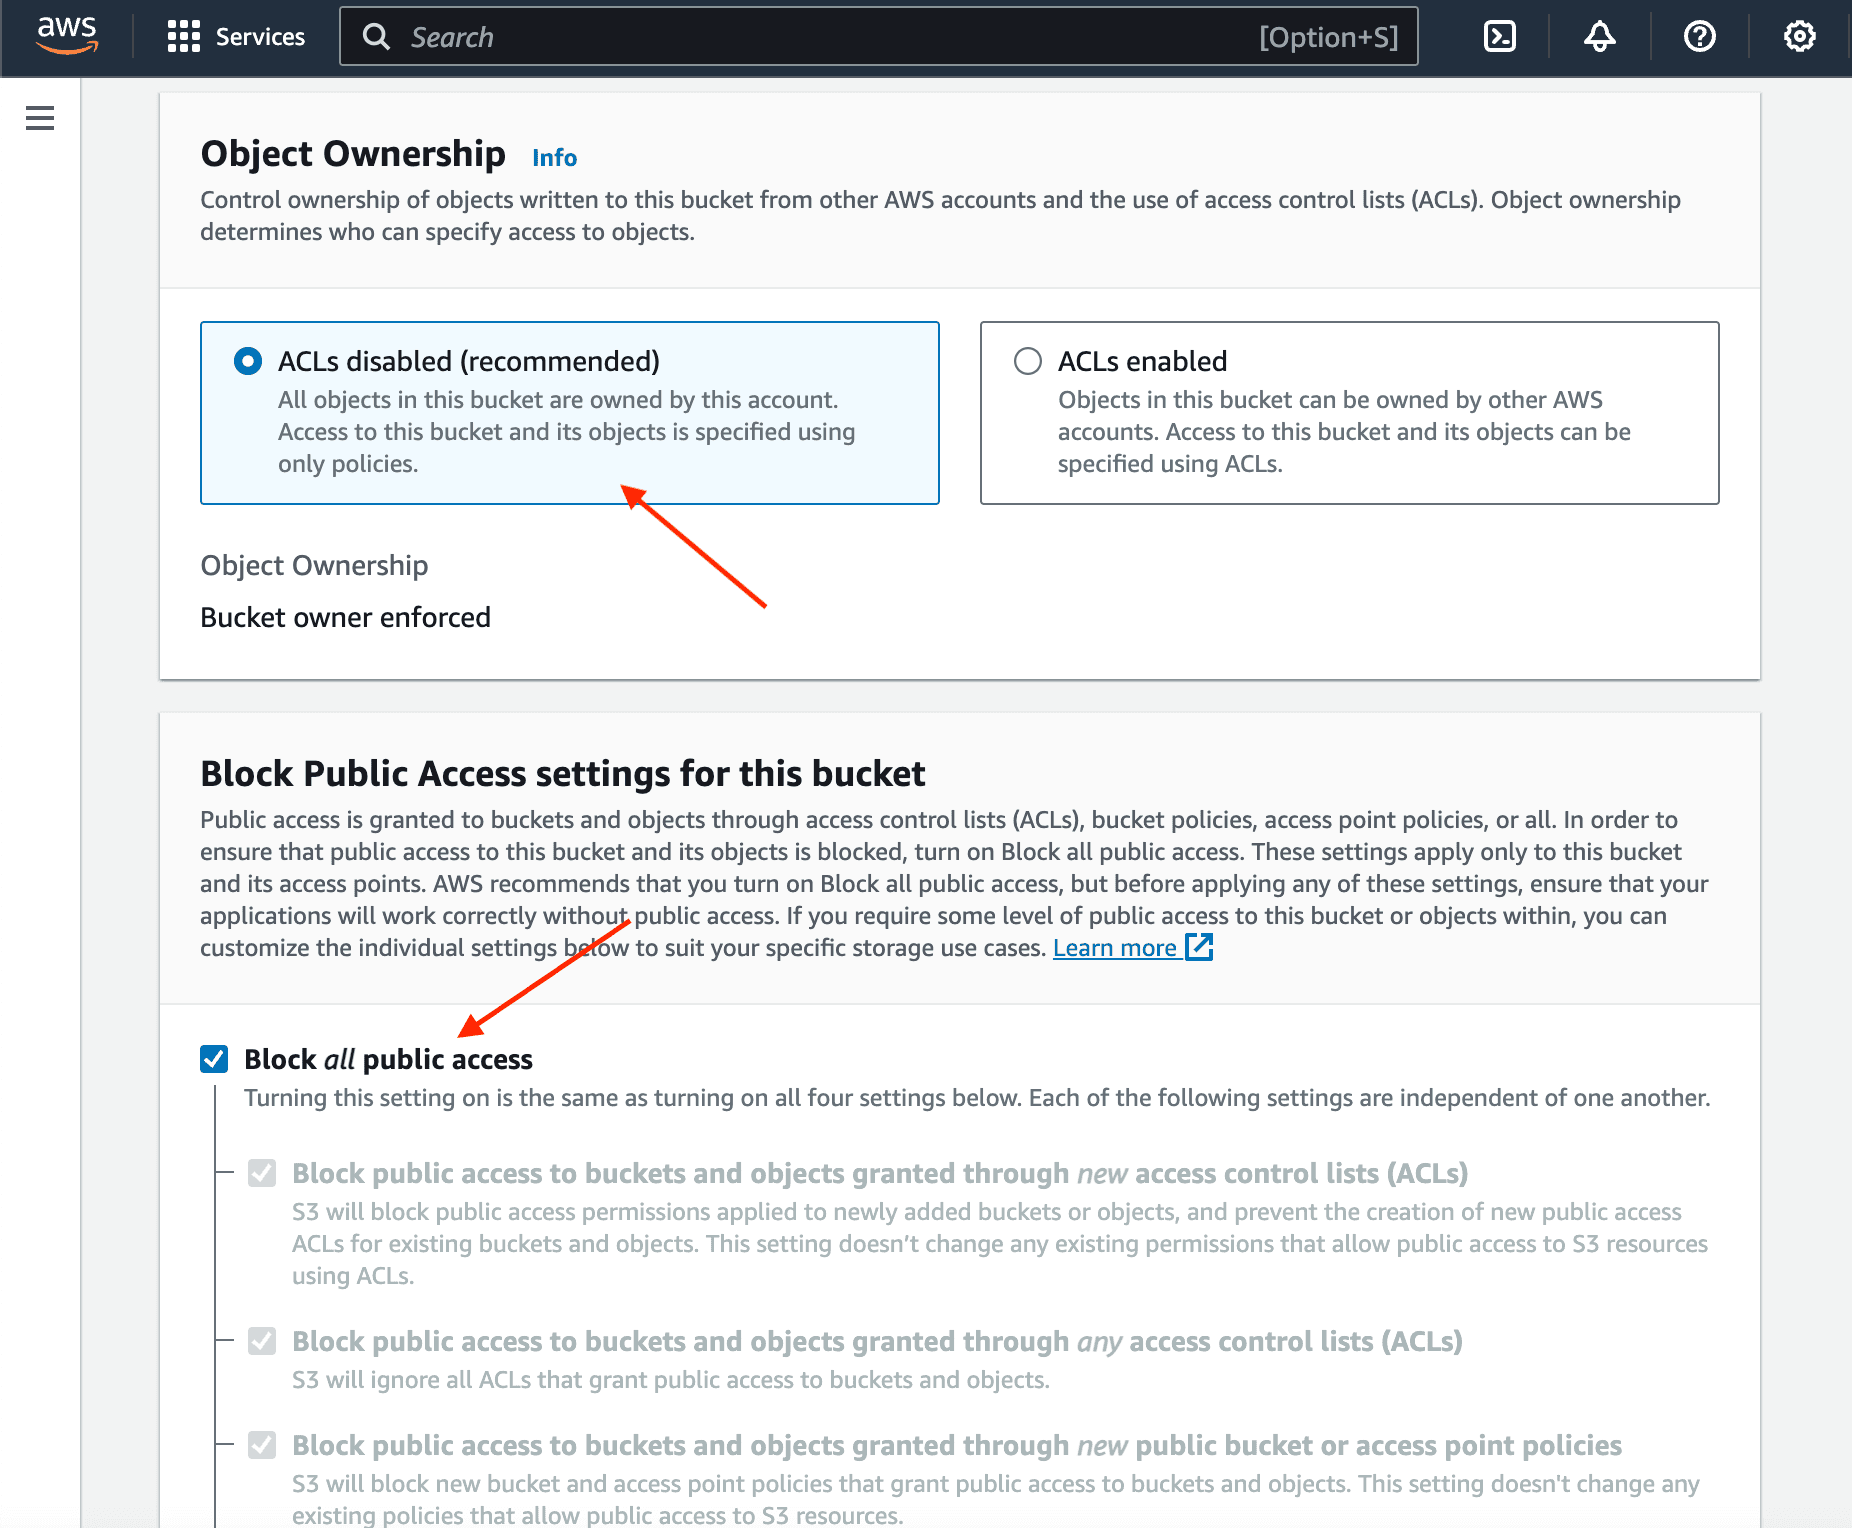
Add a bucket name and region. (You'll need to input these in the project creation modal on Y-Sweet Cloud.) By default, ACLs should be disabled. Public access should also be blocked.
Create a new access policy
To create a new access policy, click your username in the top corner, then Security Credentials in the dropdown, then click Policies in the sidebar under Access management.
On the Create policy page, switch to the JSON tab in the policy editor.
In the JSON tab, copy and paste the following policy:
Swap out YOUR_BUCKET_HERE with the name of the bucket you created above. Make sure to keep the
/* in the first line.
{
    "Version": "2012-10-17",
    "Statement": [
        {
            "Effect": "Allow",
            "Action": [
                "s3:PutObject",
                "s3:GetObject",
                "s3:DeleteObject",
                "s3:ListBucket"
            ],
            "Resource": [
                "arn:aws:s3:::YOUR_BUCKET_HERE/*",
                "arn:aws:s3:::YOUR_BUCKET_HERE"
            ]
        }
    ]
}
At the bottom of the page, click Next Step. Give your policy a name (for example, y-sweet-policy) and create the policy.
With this access policy, Y-Sweet Cloud will only have permissions to read and write your document data to this S3 bucket. It won't have access to any other S3 buckets or to any other AWS resources in your account.
Create a user that Y-Sweet can use to access your S3 bucket
In the sidebar under Access management, click create user.
Give your user a name (for example, y-sweet-user). Go to the next step.
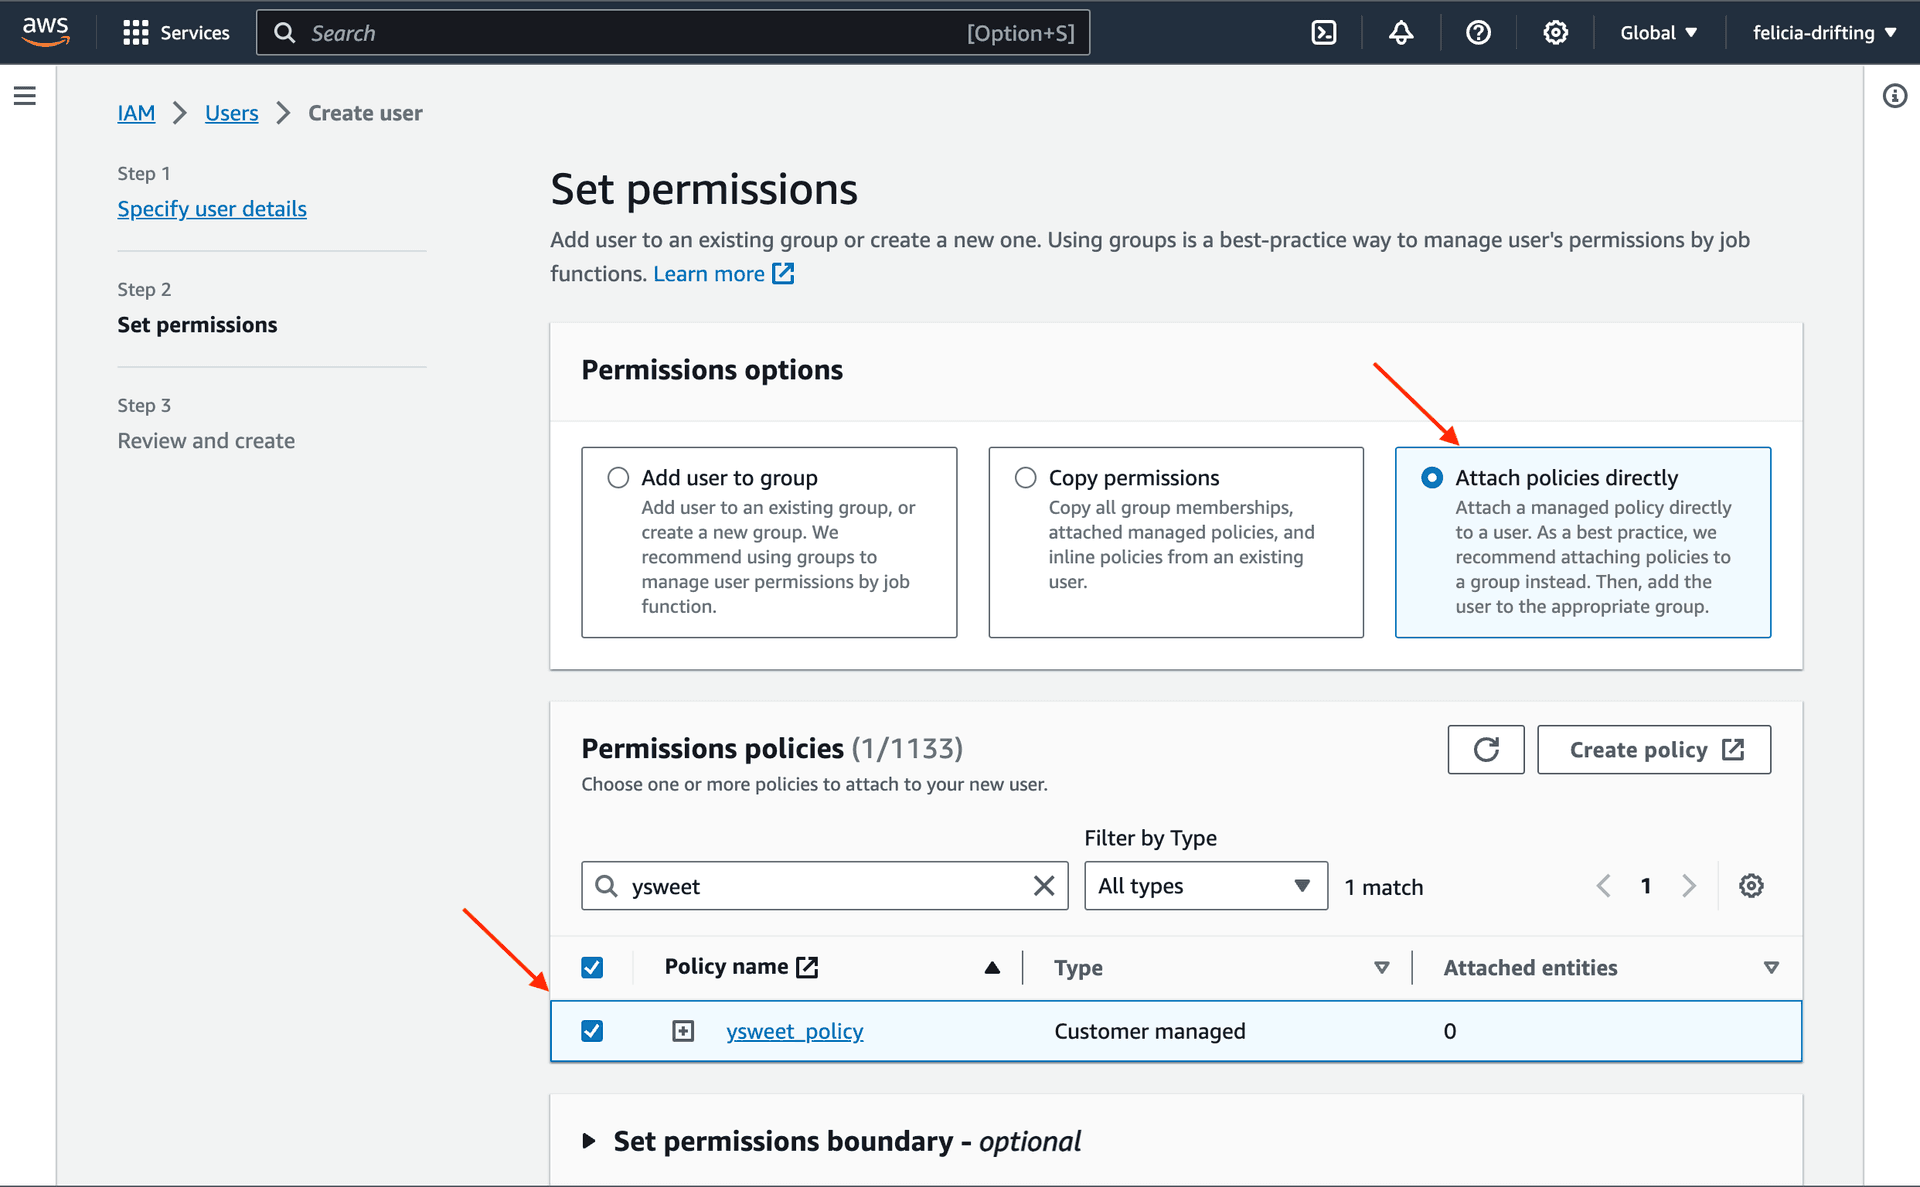
Set permissions for the user.
Select Attach policies directly. Search for the policy that you just created and check the box next to it before creating the user.
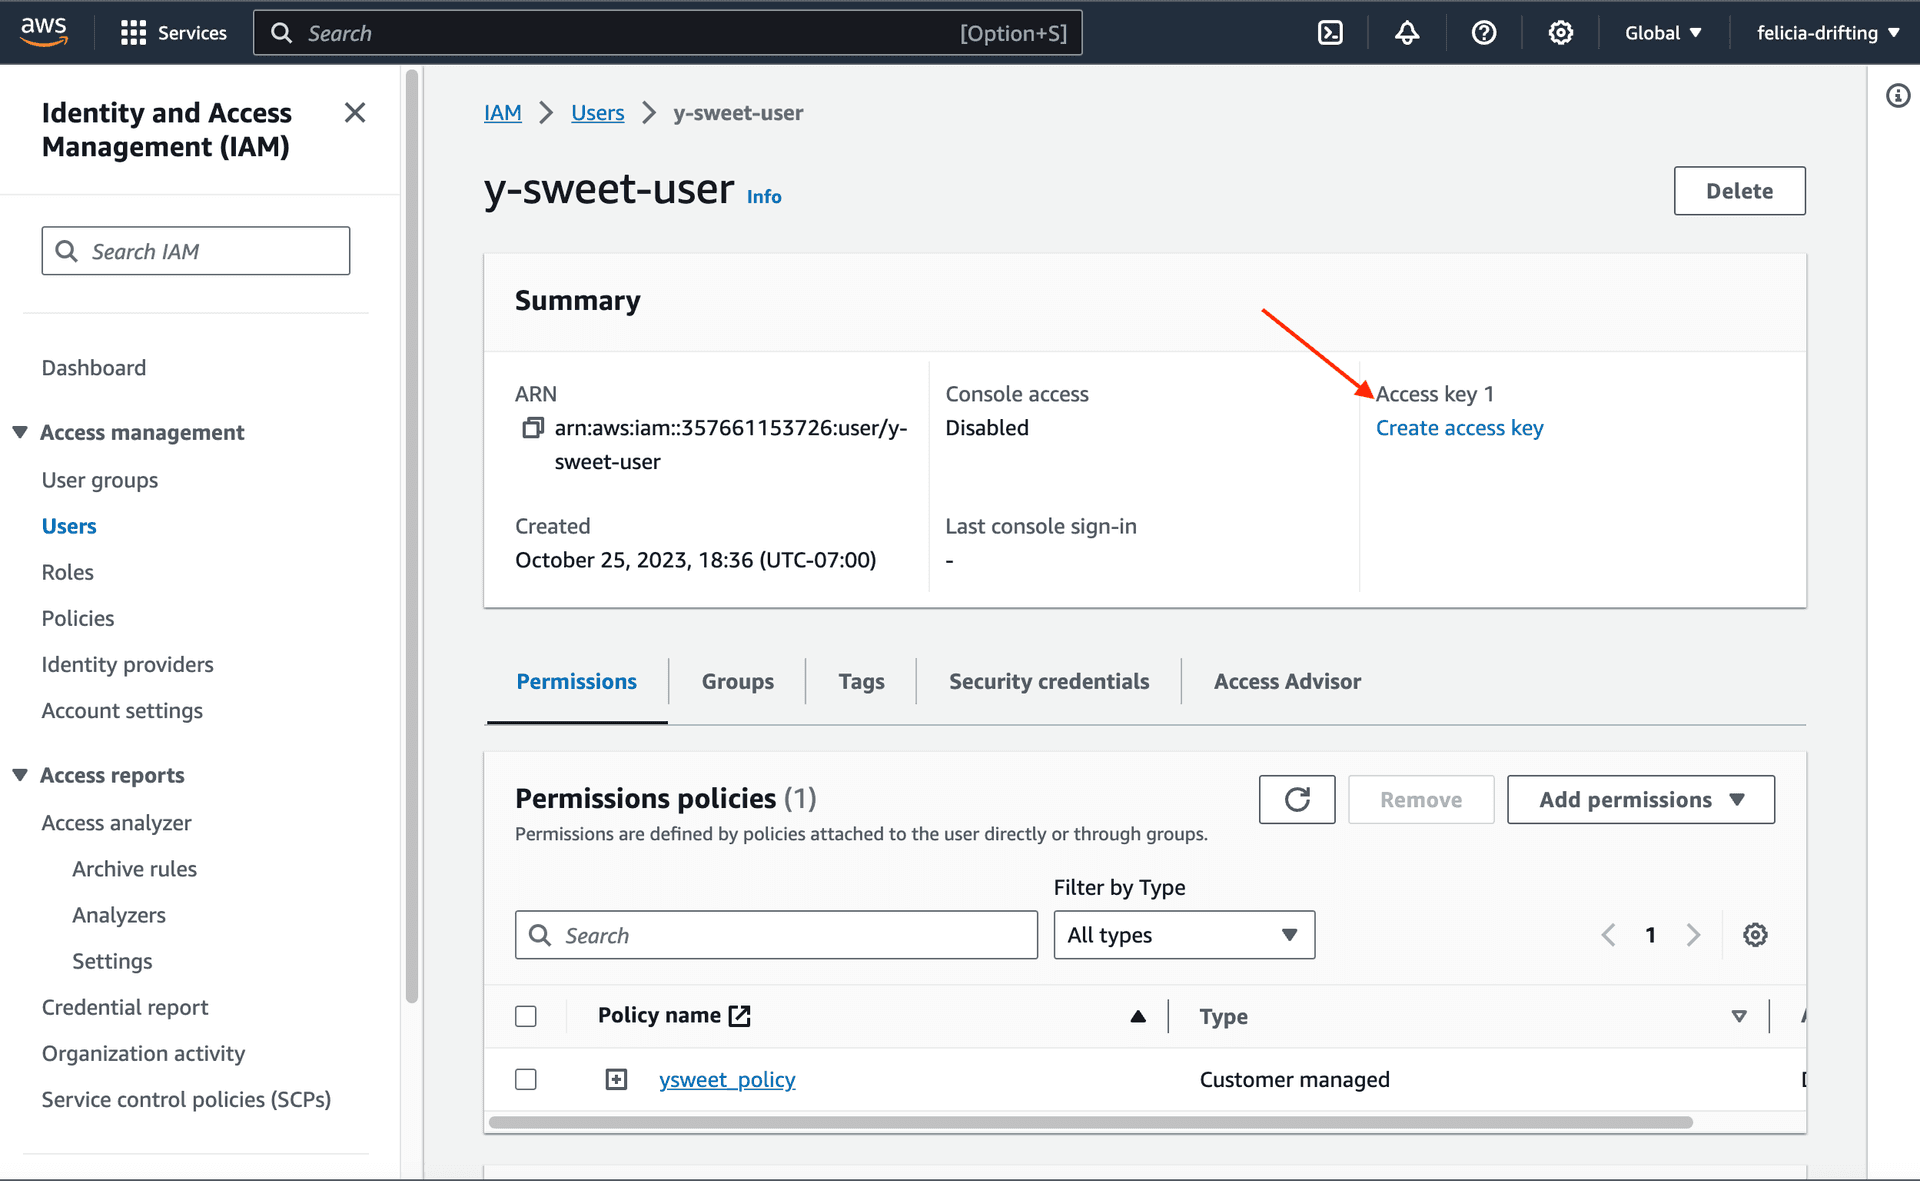
Get an an access key.
Once you've created a user, you can click the user name and on the user page. Then click create access key.
It'll open a page called Access key best practices & alternatives. Choose the Other use case.
Copy the access key and secret you've just created into Y-Sweet's project creation form.
Make sure you also provide the bucket name and region. Then create your project. Y-Sweet Cloud will check that it can access the bucket you've created with the credentials you've provided before it creates the new project. If this validation step fails, double check that you've entered the correct values and try again.
This is a new feature, so if you run into any issues in this process, please contact hi@jamsocket.com. Or find us on discord (opens in a new tab).